YAML Supercharged: Simplifying K8s Configurations and Monokle


In the last blog, I mentioned that there are 2 ways of interacting with a K8s cluster - an imperative way and a declarative way. We deployed the Nginx web server on Kubernetes cluster using Imperative way(using kubectl commands). It works if the command is simple. but what if it is a complex resource? It is better and easier to use the Declarative way. And for that we have YAML!
YAML - "YAML Ain't a Markup Language"
YAML's full form is "YAML Ain't a Markup Language". The previous full form for YAML was "Yet Another Markup Language." However, the creators and maintainers of YAML later decided to change it to "YAML Ain't Markup Language" to emphasize that YAML is not a traditional markup language like XML or HTML.
The change was driven by the fact by a desire to highlight its distinctive characteristics as a data serialization format. The previous and original full form, "Yet Another Markup Language," implied that YAML was just another markup language like HTML and XML. Although YAML's design principles were different from other markup languages.
What is Data Serialization?
Data serialization is the process of converting objects into a stream of bytes. And why should we do that? We do that so that it can be stored, transmitted and persisted and then later reconstructed in objects (deserialization).

Now suppose I have a stream, where do I store it? I can store it in the form of files, in a database or in memory.
Why YAML?
So YAML is a data serialization format that is widely adopted by the K8s community. There are many reasons for that:-
YAML's syntax is designed to be easy for humans to read and write.
YAML's indentation-based structure provides a clear and intuitive representation of data hierarchies.
YAML uses a concise syntax that requires less verbosity compared to other formats like JSON or XML.
Strong Integration with Kubernetes
Version Control Friendly
Kubernetes YAML files can be used across various deployment environments and Kubernetes distributions without modification, enabling seamless deployment and migration.
YAML parsers and libraries are available in many languages, simplifying the process of manipulating and interacting with Kubernetes configurations.
If I talk in terms of Kubernetes, YAML has become the standard language for defining Kubernetes resources. It is natively supported by Kubernetes and widely used in the Kubernetes community. This tight integration ensures compatibility and ease of use within the Kubernetes ecosystem.
Understanding YAML syntax
So what does a YAML file look like?
apiVersion: v1
kind: Pod
metadata:
  creationTimestamp: null
  labels:
    run: nginx-server
  name: nginx-server
spec:
  containers:
  - image: nginx
    name: nginx-server
    resources: {}
  dnsPolicy: ClusterFirst
  restartPolicy: Always
status: {}
Before explaining any further I would like to tell you that indentation matters a lot in YAML! If somewhere you did a typing error and added a couple of extra spaces it will affect a lot. Each level of indentation represents a child element within its parent element.
In this YAML file, we define a Kubernetes resource called a Pod using version 1 of the API. The metadata section provides details about the Pod, including labels and the Pod's name. The Pod's creation timestamp is not specified.
The Pod is labelled as run: nginx-server, associating it with the label run and the value nginx-server. The name of the Pod is set as nginx-server.
The spec section describes the desired state of the Pod. Within the containers subsection, we define a single container. The container uses the nginx Docker image and is named nginx-server. The resources subsection is empty, allowing for future configuration of resource limits and requests.
The Pod's DNS resolution policy is set to ClusterFirst, meaning it uses the cluster's DNS. The restart policy is set to Always, indicating that the Pod should be restarted if it terminates.
The status section is left empty, as Kubernetes will update it to reflect the actual state of the Pod.
apiVersion: v1    // Specifies the API version being used (version 1)
kind: Pod         // Defines the type of Kubernetes resource (Pod)
metadata:         // Contains metadata information about the Pod
  creationTimestamp: null   // Creation timestamp is not set
  labels:                  // Labels associated with the Pod
    run: nginx-server      // Label "run" with value "nginx-server"
  name: nginx-server       // Name of the Pod is set as "nginx-server"
spec:                      // Describes the desired state of the Pod
  containers:              // Defines the containers running inside the Pod
  - image: nginx           // Docker image to use for the container (nginx)
    name: nginx-server     // Name of the container is set as "nginx-server"
    resources: {}          // Placeholder for specifying resource limits and requests
  dnsPolicy: ClusterFirst  // DNS resolution policy for the Pod is set to "ClusterFirst"
  restartPolicy: Always    // Restart policy for the Pod is set to "Always"
status: {}                 // Current status of the Pod is left empty (to be updated by Kubernetes)
Note: YAML does not support comments written like this. It's just for understanding purposes.
Creating a resource in Kubernetes using YAML
Now let's create a resource in K8s using the YAML file (declarative way). make sure Docker is running and start minikube:
$ minikube start
Open the terminal and type:
$ vim sample-pod.yaml
And paste this content:
apiVersion: v1
kind: Pod
metadata:
  creationTimestamp: null
  labels:
    run: nginx-server
  name: nginx-server
spec:
  containers:
  - image: nginx
    name: nginx-server
    resources: {}
  dnsPolicy: ClusterFirst
  restartPolicy: Always
status: {}
Now save the file and exit the vim. Now run the following command:
$ kubectl apply -f sample-pod.yaml

pod/nginx-server created
If you need to make changes to the resource's configuration, you can update the YAML file accordingly. You can modify properties such as container images, replicas, or other specifications in the YAML file. After making the changes, reapply the updated YAML file using the kubectl apply command again to deploy the updated configuration.
Suppose you want to create a deployment of the YAML file:
apiVersion: apps/v1
kind: Deployment
metadata:
  name: nginx-deployment
spec:
  replicas: 3
  selector:
    matchLabels:
      app: nginx
  template:
    metadata:
      labels:
        app: nginx
    spec:
      containers:
      - name: nginx
        image: nginx:latest
        ports:
        - containerPort: 80
Save the YAML file as nginx-deployment.yaml and then run the following in terminal:
$ kubectl apply -f nginx-deployment.yaml

deployment.apps/nginx-deployment configured
This will create the Deployment with 3 replicas of the Nginx Pod. You can verify the deployment using kubectl get deployments and check the status and details with kubectl describe deployment nginx-deployment.
Note: you should always read the official docs for reference purposes and to know the updated rules.
This is the basic stuff. YAML files can get big in practical clusters when there are many resources. Managing so many YAML files can get tedious and one might scratch their heads when stuck in an issue.
There is a tool called Monokle that makes configuration file management and resource validation easier for you!
Using Monokle
When navigating through big projects and using Monokle, you don't have to edit YAMLs or write repetitive kubectl commands. With just a few clicks, Monokle does it for you.
Download Monokle and open the Desktop app.
You will see a page like this:
Now let's create a resource using Monokle.
Steps:
Create a new project with any name.
You will see a dashboard like this:
Click on New Resource from advanced templates.
For now, we will be creating a Basic pod. Enter the following details.

Click Save
The Resource is created:
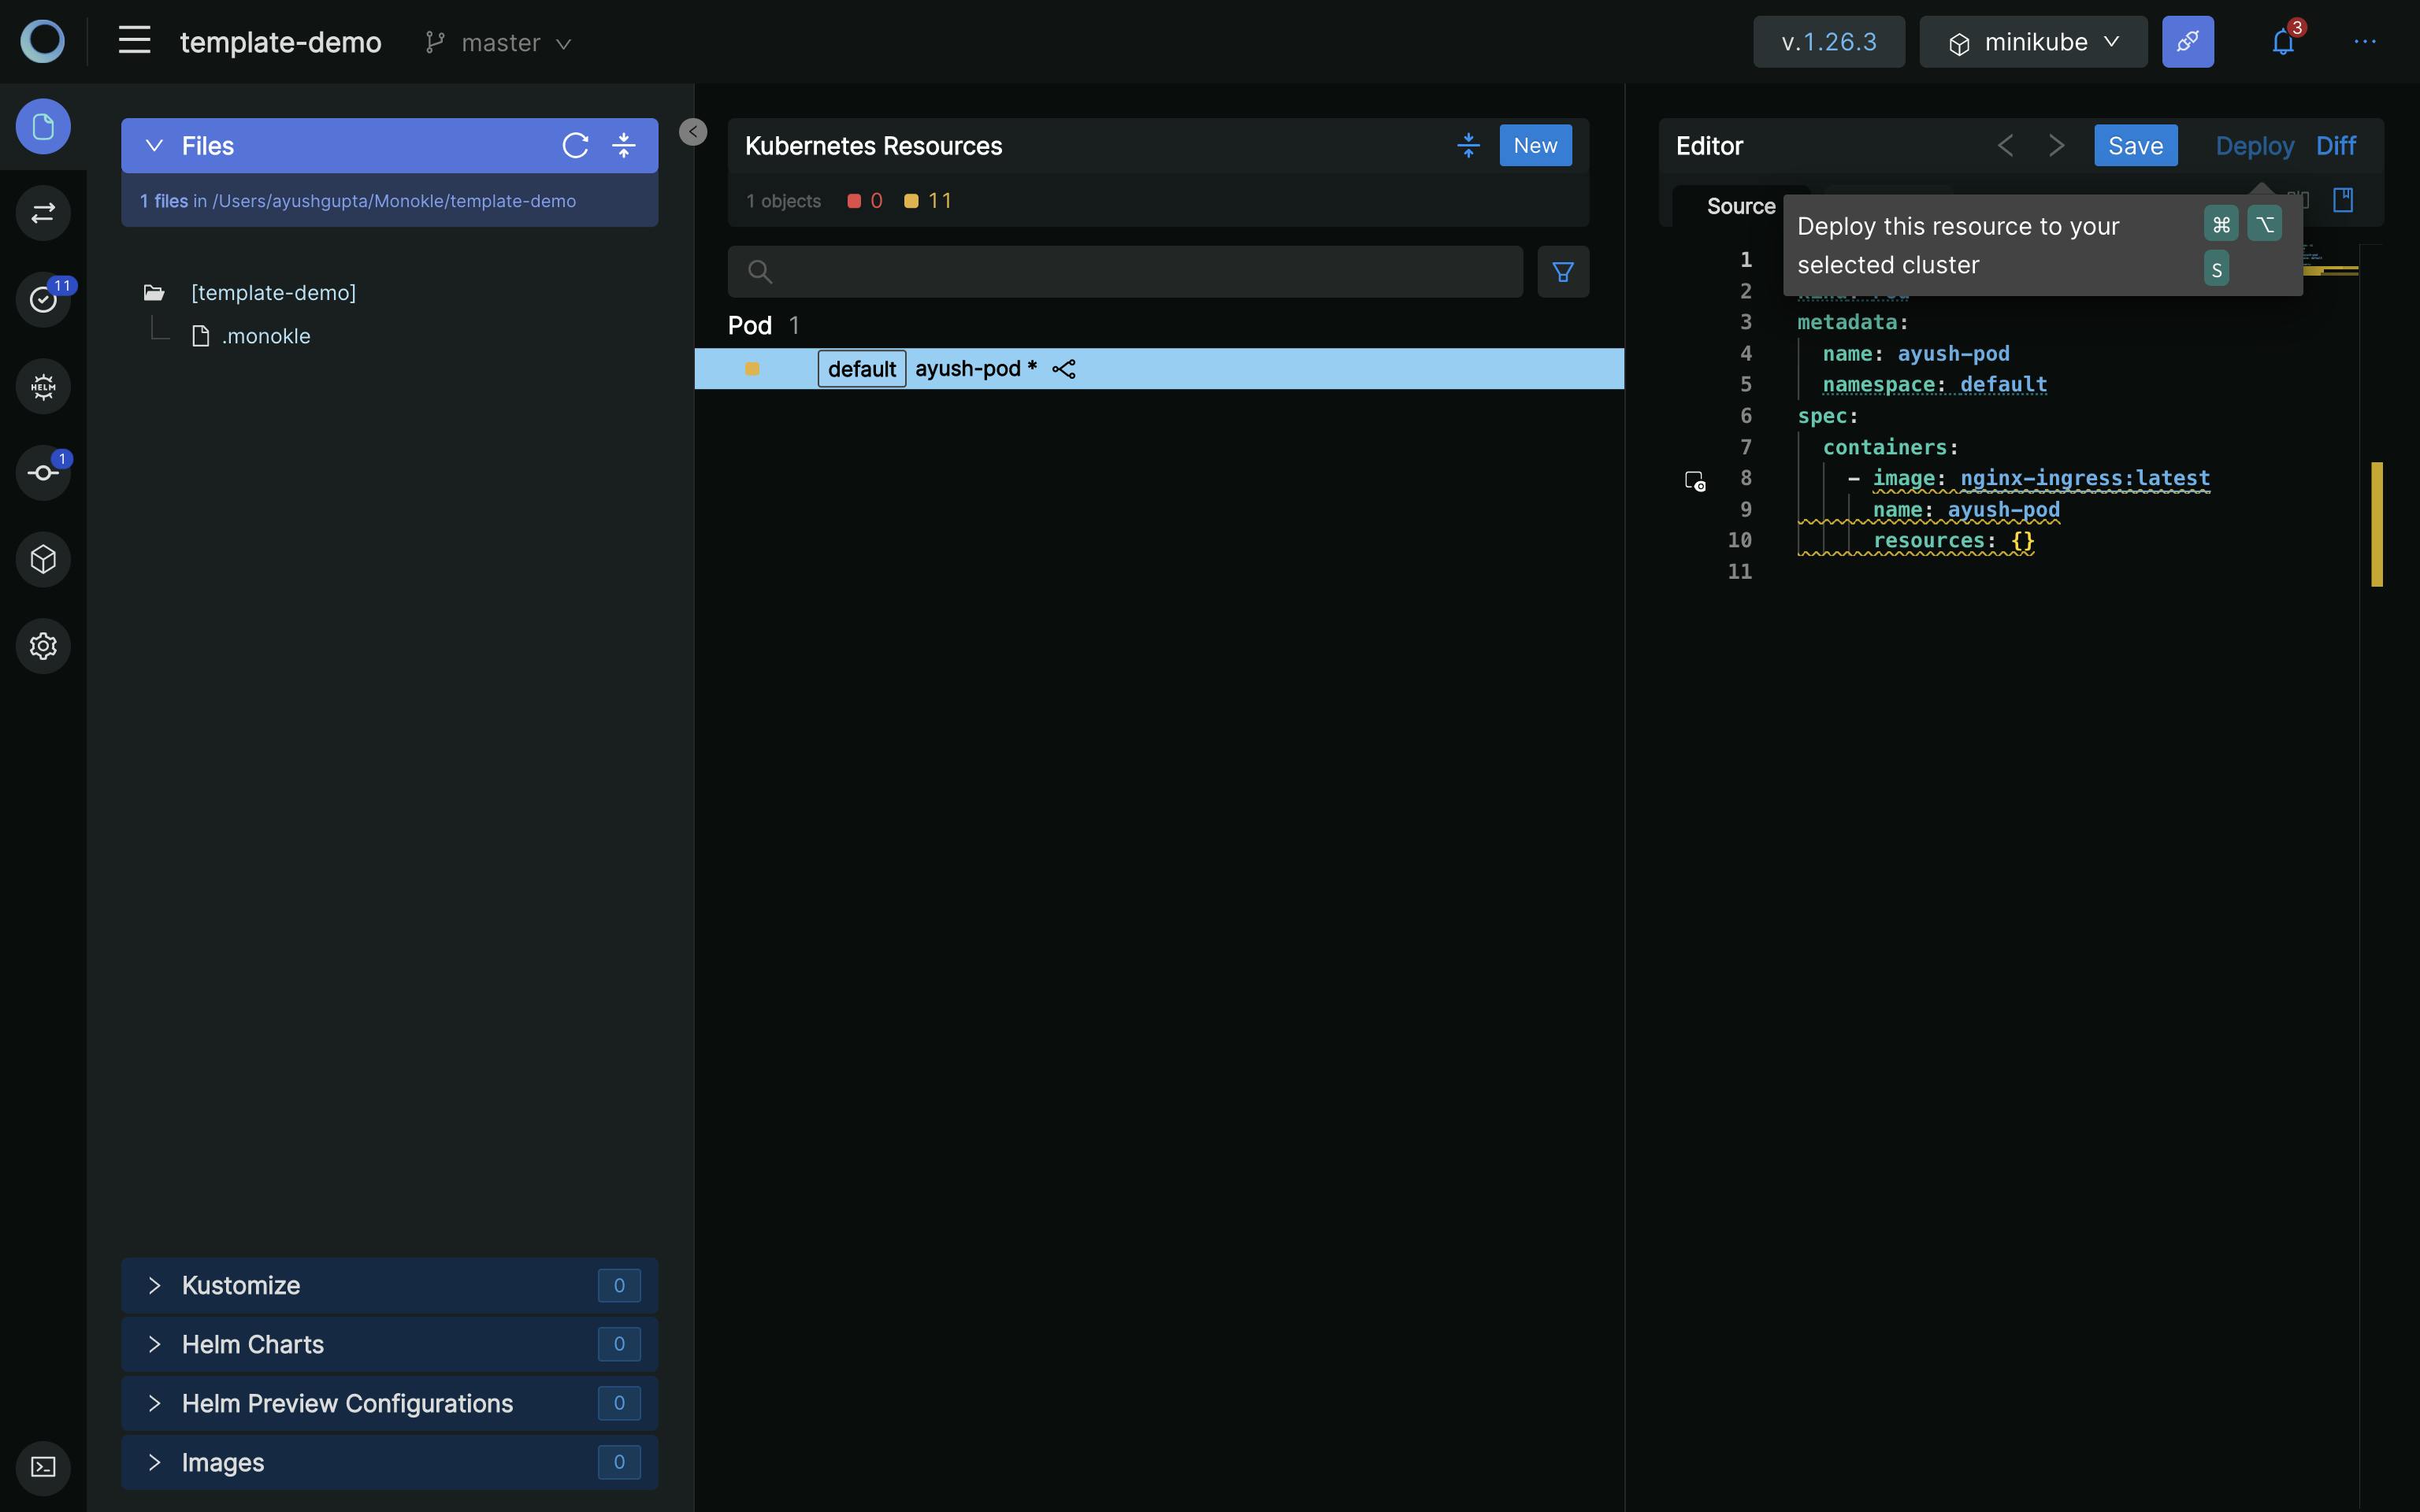
Now click on Deploy on the top right
Pod is deployed!
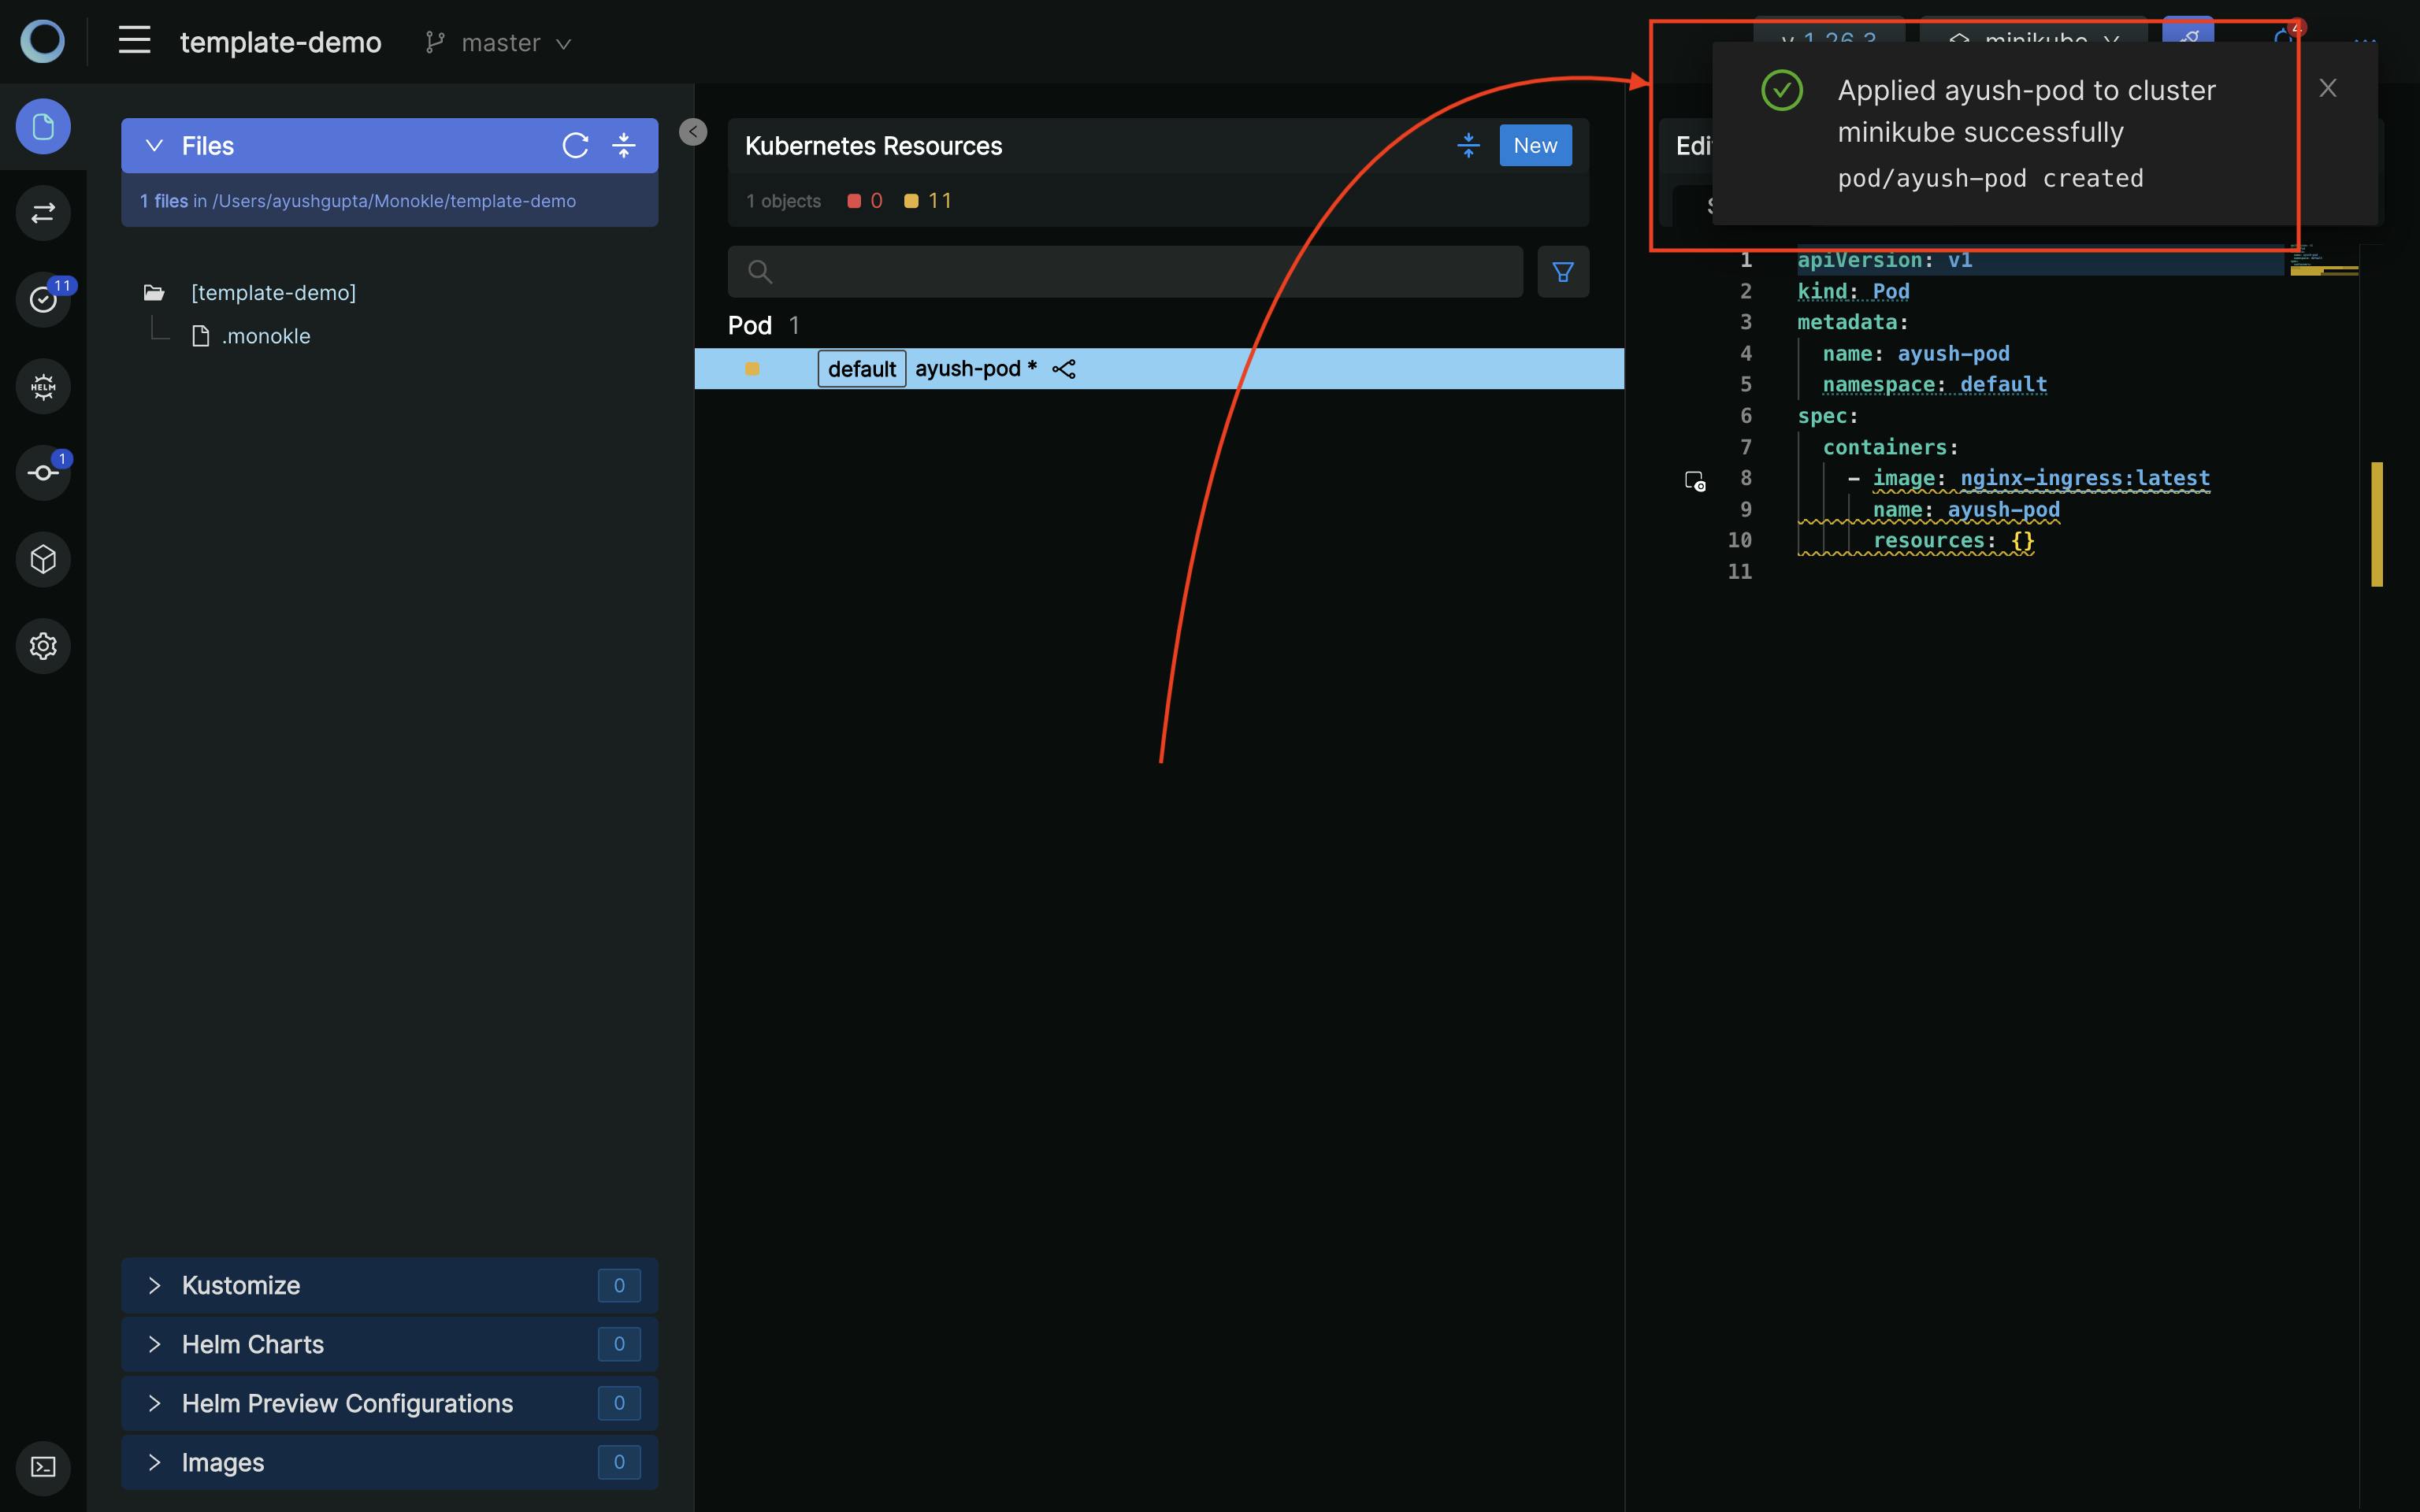
You can check via terminal:

Conclusion
In conclusion, YAML plays a critical role in the world of configuration management, especially within the context of Kubernetes. Its human-readable and intuitive syntax makes it a popular choice for defining and organizing configuration files for applications, frameworks, and tools. YAML's ability to represent complex data structures, support for comments, and compatibility with multiple programming languages further contribute to its widespread adoption.
Throughout this blog, we explored the significance of YAML in various aspects. We discussed its evolution from a markup language to a data serialization format, highlighting its advantages in terms of readability, flexibility, and ease of use. We also examined its role in Kubernetes, where YAML serves as a foundation for defining resources and managing deployments.
It's worth noting that tools like Monokle can greatly assist in working with YAML files. Monokle provides features such as syntax highlighting, linting, and validation, which help identify and correct YAML-related errors, ensuring adherence to best practices. By leveraging tools like Monokle, developers and operators can streamline their YAML-based workflows and enhance overall productivity.